
")
4 Tips for Better Night Photography
I first became fascinated with night photography and long exposures in 2008, very early in my photographic career. Even years later it still amazes me that cameras can record what our eyes can not see over the course of an extended period of time. This fascination ranges from stars, hidden landscapes, blurred skies/water, and the mixing of warm artificial light with a deep blue night sky. My early journeys in 2008 took me around New Jersey as I captured the juxtaposition of industrial areas intersecting with nature and residential homes. Today I make my living photographing weddings and portraits, but I still have a deep passion for landscape and night photography. This past year I traveled twice to Tromsø, Norway to chase the Northern Lights, which I consider to be the holy grail of night landscape photography. Many of the images in this post will be from those trips.
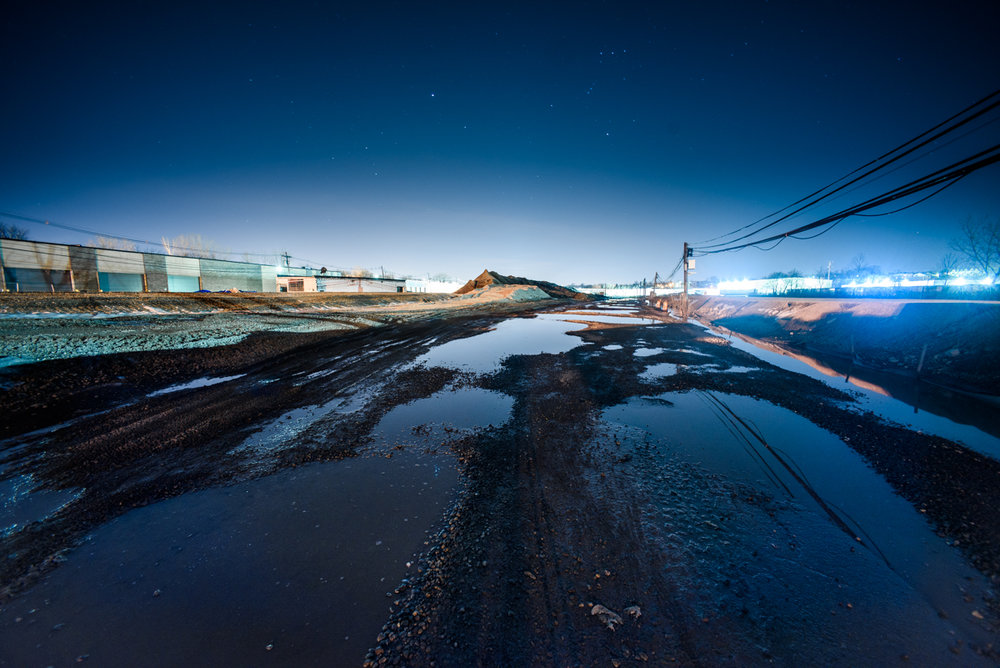
My original interest in night photography began with more industrial and artificially lit scenes. The stars are not very visible, but the reflections and glow of night scenes have always attracted me to keep trying new things.
In October I am teaching a night photography course at the Photo Rehab event in Moab Utah. Here are 4 tips and tricks that I have learned over the years that will help you take more more successful night photographs. If you have any questions about any of the topics in this article please do not hesitate to e-mail me info@mikezawadzki.com or leave a comment on this post.
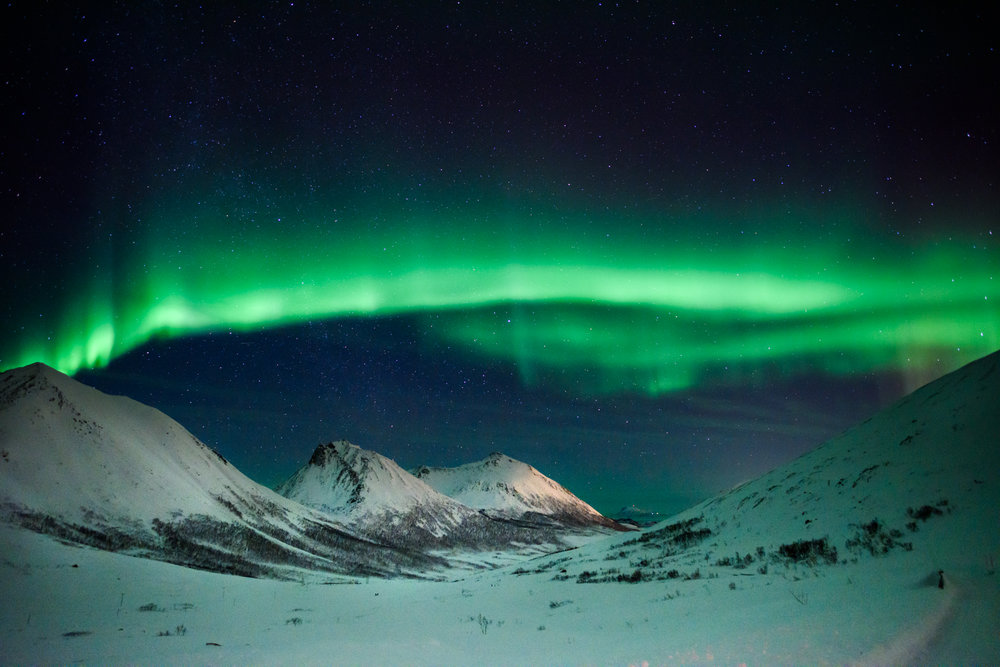
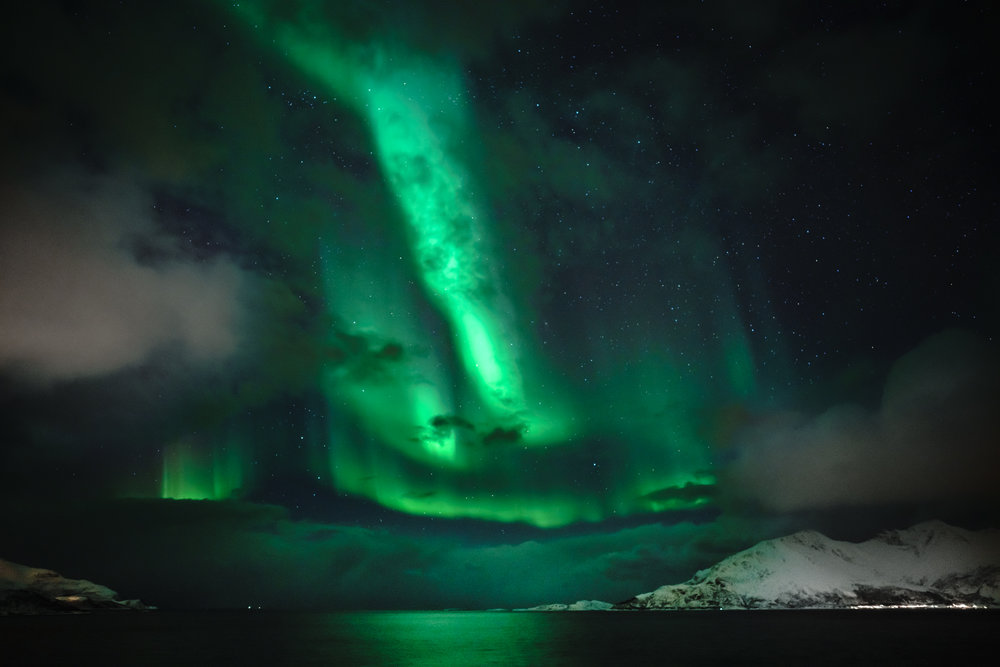
A band of the Aurora Borealis streaks across the winter sky in the area of Tromvik, Norway. Without careful planning and technical expertise, it would have been very difficult for me to capture this image, and a waste of an expensive trip.
1. Buy a Solid Tripod
Tripods seem so yesterday. Seriously who uses them anymore? Cameras in 2016 can truly see in the dark. A full frame sensor equipped with fast glass allows hand held pictures that were impossible to take even as recently as 5 years ago. This is especially useful for street, urban exploration, and event photography. However most night photographs require long exposures ranging anywhere from a few seconds to a few minutes, depending on the desired effect. Photographs of the stars require exposures that use a several second long shutter speed, a fast aperture, and a high ISO. Though you may not use it for other types of photography, a tripod is an invaluable part of your kit for night photography, and you should buy a strong one. Do not cheap out on your tripod. Consider that you are potentially putting thousands of dollars of camera gear at risk, and losing priceless photographs by using an inexpensive/flimsy tripod. This time lapse would have been impossible to make with a shaky tripod. I needed my camera to stay in the same place for almost an entire hour. Longer time lapses need even more time.
Over the course of a long exposure wind and ground vibrations can ruin your otherwise perfectly nice photograph or time lapse video. If staying local, I suggest a set of sturdy legs like the Manfrotto 055 Carbon Fiber series. In general Carbon Fiber (CF) tripods are more expensive, but lighter weight. More importantly CF tripods are less susceptible to vibration than typical aluminum tripod legs. The type of head you use on a tripod is up to you. I prefer ball-heads, but others use more precise pan-tilt heads. Just make sure whatever you decide on is strong enough to support your camera and lens combination. The advertised maximum load capacity for tripod heads usually indicates how much weight it can support while in “zero position” meaning the load of your camera and lens is being held directly over center. The maximum load capacity of your tripod head can be cut in half even with a small adjustment. For those on the go there are a plethora of options offered by any number of manufacturers. Many of these tripods are probably made in the same 2 factories in the Shenzhen district of China. If you’re really serious about night photography and like to travel, get a Gitzo. It will last forever and there is a special level of craftsmanship and quality control that is unmatched in the travel tripod category. Also consider that most tripods will have a hook on the bottom that you can attach your camera bag or another kind of weight to. This will help further ground the tripod.
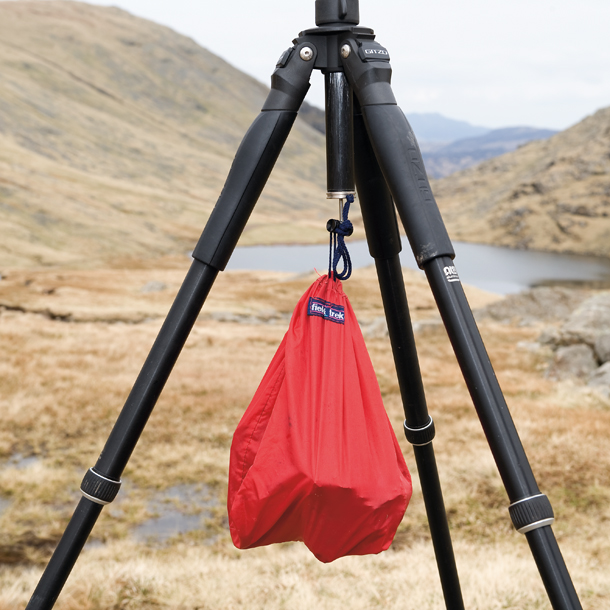
A weighted bag helps hold a sturdy Gitzo tripod in place. Credit: DPReview
Modern cameras are impressive because of how well they perform in low light, but it takes a combination of long exposure times (6 seconds) aperture (2.8) and ISO (3200) to achieve a successful night image like this Northern Lights image I made in Norway (Feb 2016)
2. Manual Focus Forever
Focusing can be the most difficult part of night photography. Autofocus can sometimes work with cityscapes and other night scenes, but points of light at a far distance are still not the most accurate, as they can throw off AF systems in DSLRs. For these types of scenes I suggest using the “Live View” mode on your camera. You can zoom in on the LCD screen and manually focus your lens to make sure the intended point of focus is tack sharp. Even the best camera and lens combinations cannot autofocus in pitch black conditions, which are also the best conditions for photographing stars. In these situations the Live View mode is only so useful. Stars appear as grainy pixilated magnified dots on the camera’s LCD. In these situations it is best to try focusing at “infinity focus” which is designated on your lens’s focusing scale.
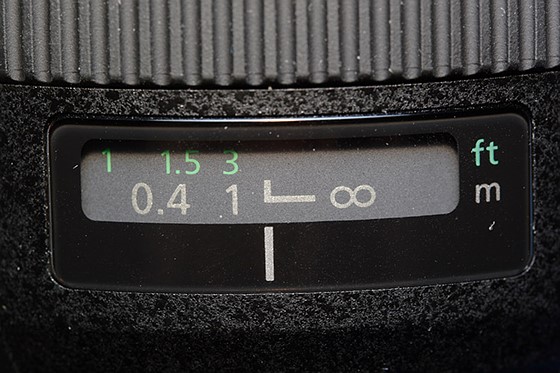
The symbol for manual focus on a standard Canon lens. The range within infinity focus falls varies from lens to lens and there is a degree of trial and error before finding what I call the “sweet spot”. You can find infinity focus during the day more easily and then leave your lens set to Manual Focus to use at night. I still suggest crucial double checking at night in order to make sure nothing has changed since daytime. (Photo: DPReview)
Infinity focus is the point at objects past a specific distance all appear to be in focus. This point of focus occurs at much shorter distances on wide angle lenses, while not occurring for several meters away on telephoto lenses. Setting a lens to infinite focus sounds easy, but it isn’t, especially in total darkness. I highly suggest getting a LED headlamp for night photography. It will help you see your camera and lens better and you your hands will also be free to make adjustments or switch lenses. The problem is that most modern lenses do not have a hard or fixed stop at infinity. If you turn any manual focus rings all the way past the infinity symbol, your star photographs will not be in focus. There is a careful craft to finding the “sweet spot” of infinity focus on each different lens. Dedicated manual focus lenses made by Carl Zeiss or the more budget-friendly brand Rokinon are much easier to manually focus. Autofocus lenses for DSLRs aren’t designed with manual focus in mind, so they often have imprecise manual focus rings. When you find true infinity focus on a lens it is wise to make a mental note of where it is, or even use white-out or a small streak of glow in the dark paint to mark your lens. It is also important to keep in mind that atmospheric conditions such as temperature and humidity can slightly shift where true infinity focus falls on a lens.

Manually standard focal length lenses at night is not impossible. This shot was taken with a Sigma 50 ART at f/2.0 in near total darkness. I achieved infinity focus by racking the lens past infinity and pulling back slightly, using the sharpness of the stars as a guide. The smaller the stars appear in the image, the closer you are to infinite focus.
3. Go into the Darkness
If you are looking for industrial or city scenes to photograph at night, any moderately lit area will do. However finding stars is more difficult if you live in an area with light pollution like I do. Light pollution is the discoloration and hazing of the sky that occurs in densely populated regions that have many artificial lights. So the proximity of my home to New York City severely limits how many stars I can see at night. Occasionally I will use a special map to find areas that are relatively close to where I live that are especially dark. Here is a link to a map you can use to find dark areas near you. If you live in a rural area you are probably already familiar with seeing a sky full of stars. Those closer to cities (meaning anyone on the East Coast) need to find small pockets of darkness. State Parks often provide for lower light pollution and interesting foreground settings for starscape photography.
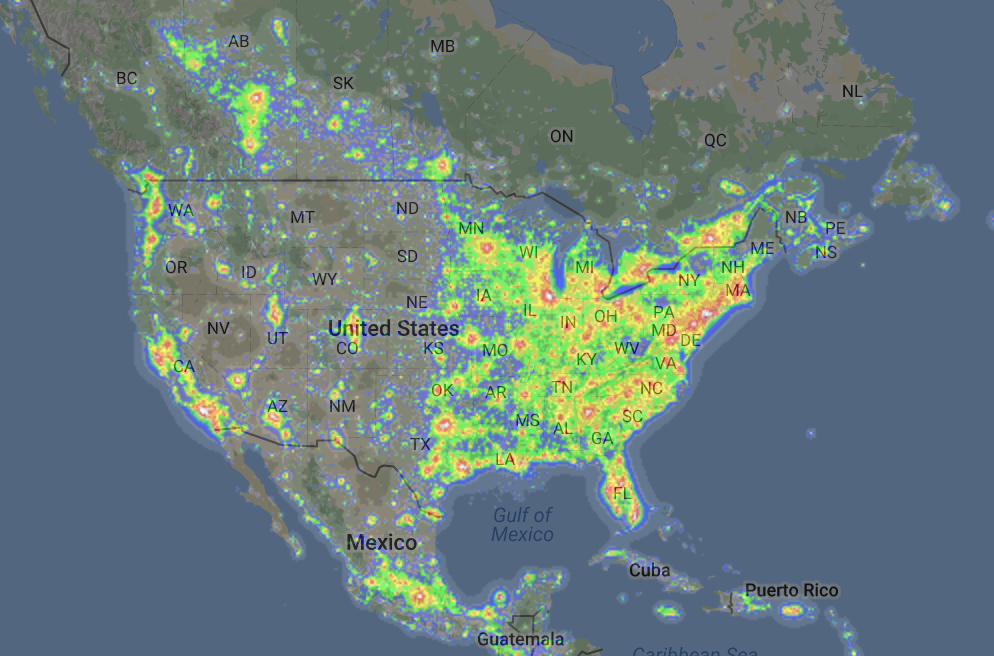
East Coast residents of the US will have to find remote areas of darkness to photograph in. This fascinating screen grab from DarkSiteFinder.com shows just how unevenly distributed the population in the US is. Almost no areas on the East Coast will be as truly dark as remote locations in the Western United States.

Light pollution is present even in some of the darkest parts of my home state of New Jersey. I was still able to capture a nice field of stars here by using 4 stitched vertical panoramic images using my favorite night photography lens, the Nikon 20mm f/1.8G
4. Limit Your Shutter Speed and Go Wide
One of the misconceptions about night photography is that your exposures need to be several minutes long. If the desired effect is to blur water, clouds, etc… and create star trails, then sure go for it. It’s easy to create excessively long exposures by lowering your ISO and stopping down your lens. Most DSLR cameras don’t have a pre-programmed shutter speed longer than 30 seconds, but do have BULB setting modes that can be triggered with a remote trigger. In bulb mode the shutter will remain open as long as the switch on the trigger is locked. Higher-end remote triggers will also let you dal in exact exposure times. The problem with several minute exposures is that noise (even at base ISO) becomes a major issue. Some of this can be cleaned up in post production or by using in-camera “Long Exposure Noise Reduction” However I prefer to just use faster shutter speeds. Another added benefit of faster shutter speeds is that stars will be “frozen” in place. Longer shutter speeds will record the motion of the Earth’s rotation, showing a trail behind stars. Some people really like to make star trail photographs, which are usually hundreds of images stacked to make vivid streaks/circles in the sky. I have not tried this yet, but will probably give it an attempt in Utah this October. Longer lenses will also record the Earth’s rotation at slower shutter speeds. On a full frame sensor I have enjoyed using a Nikon 20mm f/1.8G lens. It is sharp, fast, and wide. Others will prefer wider lenses such as the Rokinon 14mm f/2.8, or Zeiss 15mm f/2.8. While 14, or, 15 vs. 20 may not seem to be drastically different focal lengths, angle of view increases dramatically at shorter focal lengths. This is why you see 14, 15, 16, 20, and 24mm lenses, but there is only a 300mm f/2.8 lens, and not a 310mm f/2.8. The difference in angle of view becomes less substantial as focal length increases.
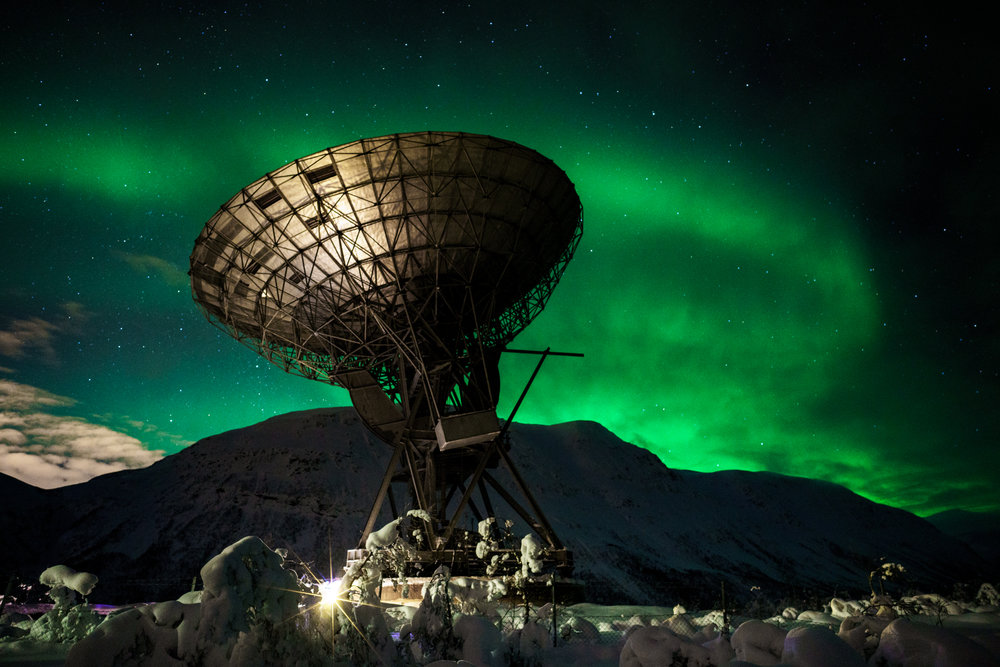
This is one of my favorite photographs taken at the EISCAT research station in Northern Norway. On this particular night the Northern Lights were not very strong, but present enough to capture some bands for a rather nice composition. Using a Zeiss 21mm f/2.8 lens on a Sony A7RII allowed me to capture all of the sky along with the dish and snow in the foreground. With the combination of a wide angle lens and fast aperture, I was able to gather enough light (to make the weaker aurora brighter) and keep the stars sharp with a shutter speed of only a few seconds.
What’s Next?
This is quite a bit of information to digest, so again please comment with any questions, especially pertaining to specific gear questions. If all of this was a bit too much for you to digest, try the following exposure settings to get a baseline for night photography. This is a rough estimate assuming you are using the widest lens you have in a remote/dark area.
data-animation-override>
“ISO 3200
f/2.8
20s”
I will be following up with an article detailing more of the creative side of night photography including composition, white balance/color, and how I do post-production in Lightroom/Photoshop. Below are some more of my favorite images and videos from my trips to Tromsø, Norway. I hope some of you reading this will be able to join me at the Photo Rehab event in October to learn more about night photography.
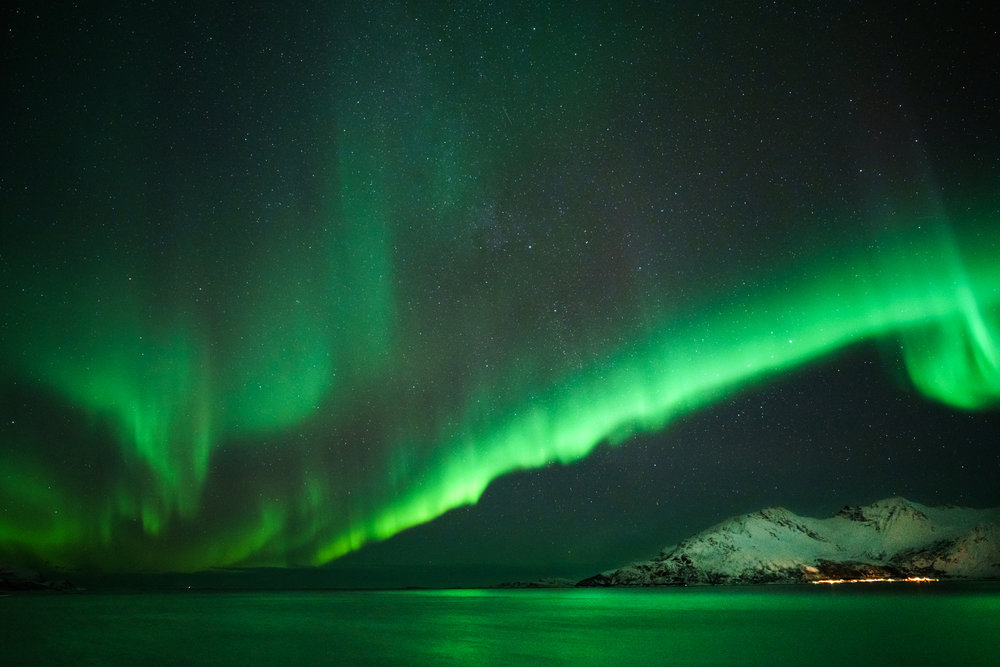
The water lit up to a bold green color on a relatively clear night near Rekvik, Norway.
While clear nights are the best for starscapes and Northern Lights, Arctic weather is volatile in the winter and it takes hours of patience to wait for a break in the clouds. I also broke rank here by using a 50mm lens instead of my usual go to 20mm. It helped frame the clouds and water in an interesting manner and was a creative choice I made on the spot.
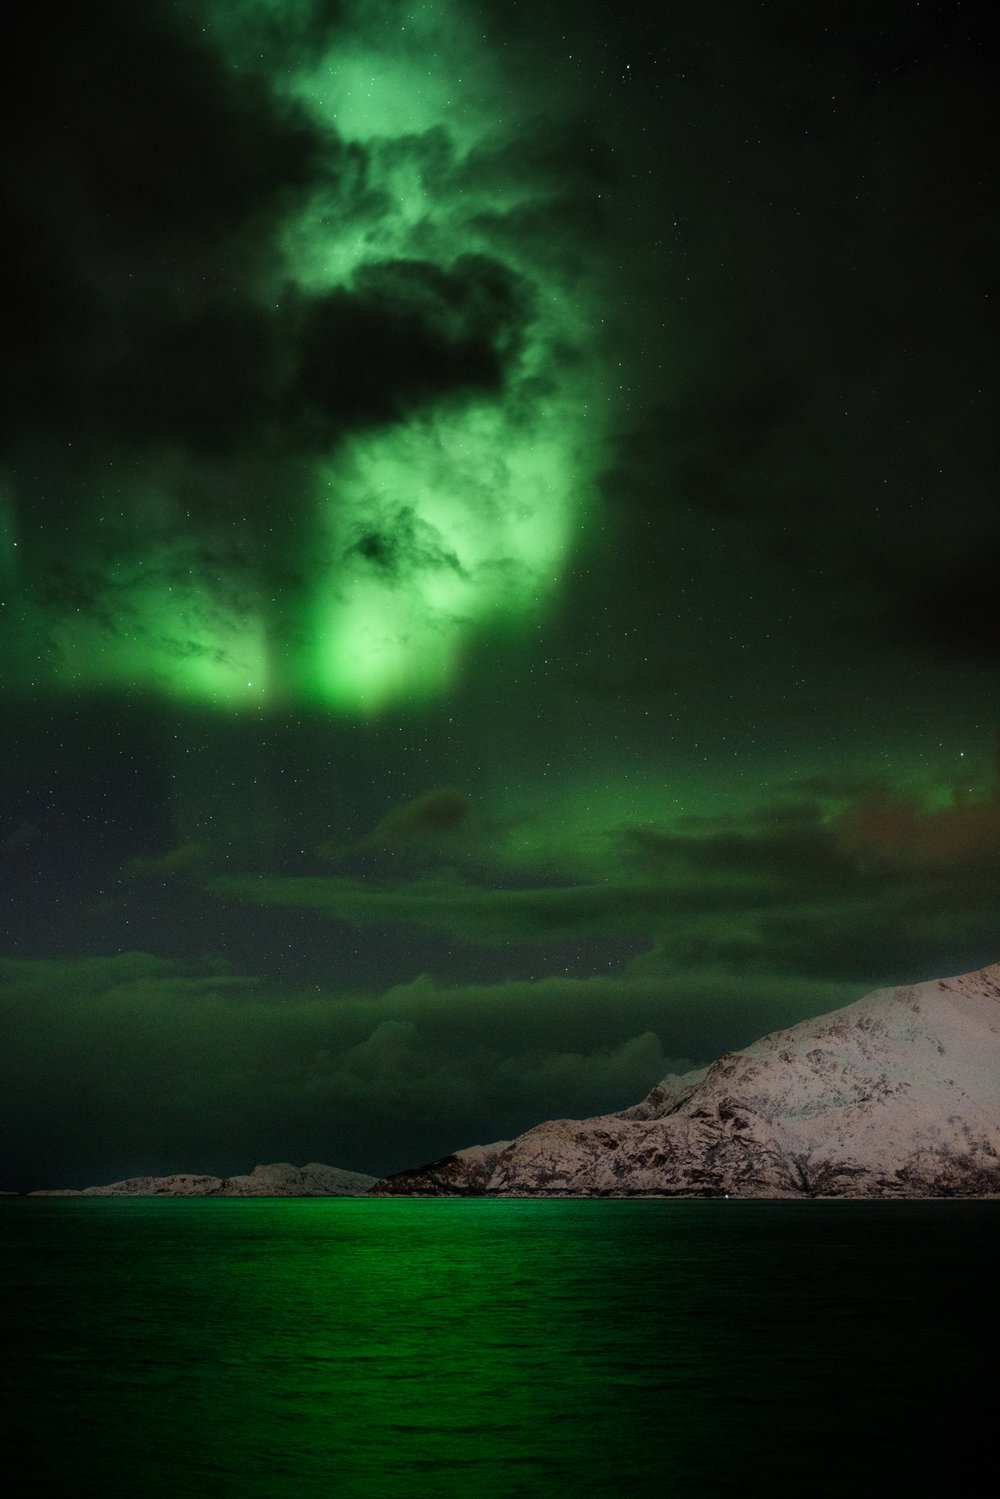
Another example of how clouds do not necessarily mean gloom and doom. They add drama to this otherwise plain sky that I have photographed several times in Rekvik, Norway.
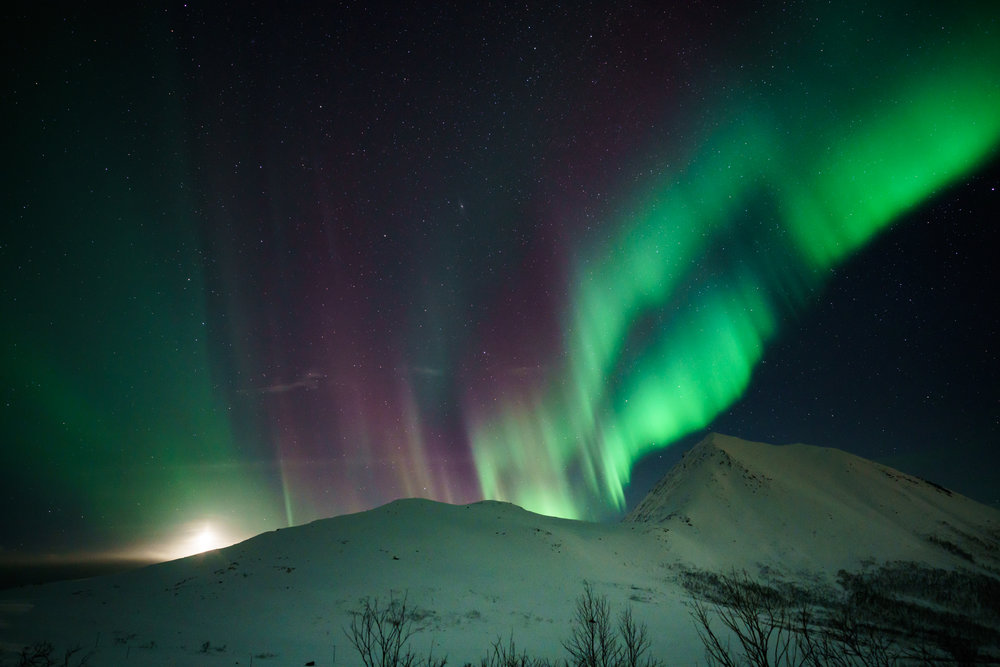
On my last night in Norway, the moon peaked out over the mountain we were on accompanied by the Aurora Borealis to say goodbye. Sharp peaks in auroral activity often bring out the red/purple colors along with the more common green streaks.
THE BLOG
Leave a Reply


Copyright 2026-2027 Mike Zawadzki Photography
Subscribe
Join our email list and download our free guide to whatever you can offer your clients of value!!


just awesome, thanks a lot for making a nice Post for us………..